MGA Inner Sills
June 2012
After much frustration, looking at substandard components and wanting to get my MGA restoration truly underway, I decided to get some inner sill components myself. The reason was I wanted them accurately made, easy to weld, have proper overlaps and be the correct thickness of material.
Thanks to Barney at MGA Guru for his site, his experience and the copies of the component drawings he let me have in CAD format. Also some of his pictures.
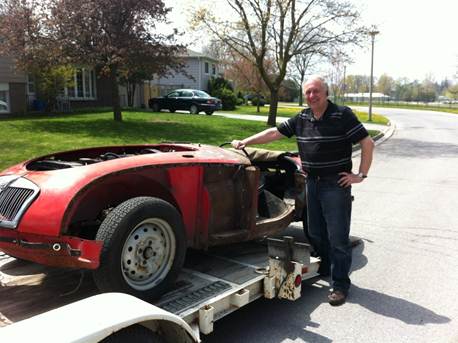
Here you can see my poor old A with the rot cut away. You will notice that there is nothing left of the sill assembly where the door should go. But! If you look carefully you will see clear evidence that this was originally an Iris Blue car and it will be so again.
There is a load of mis information on the net about MGA inner sills being very complicated, with compound and variable bends. While they are not the simplest of shapes, my bet was that modern computer controlled laser cutters and brake presses can do anything they ever attempted in Abingdon.
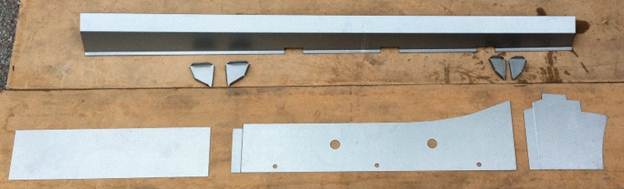
That is the inner sill, the gussets that go inside the rail below each door pillar and the three inner sill plates that hang parallel to the chassis. Note the full 1” overlaps for strength. Next is a view from the other side
Here is how they all go together.

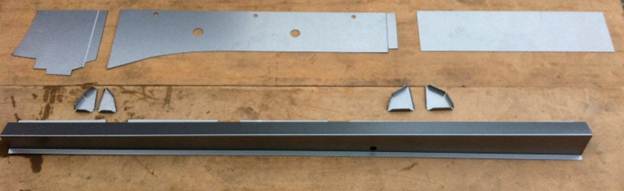
And from the other side…

These are the body components that fail most often and must be replaced prior to removing the boby from the chassis. Once they are all welded in and a brace is fitted over the cockpit, the body and chassis can be split so that they can both be worked on in parallel. It is impossible to weld and finish this area of a restoration / repair properly without removing the body. The inner sills just can’t be finished and painted in situ.

Here you can see the three inner plates in position.

Next the inner sill is offered up and spot welded into position.

Lastly the welds are completed, the posts attached and the inner sill closed off at each end.
The set up for the parts is the expensive bit, so I had six sets run while I was at it. If any club member needs a set, just give me a call.